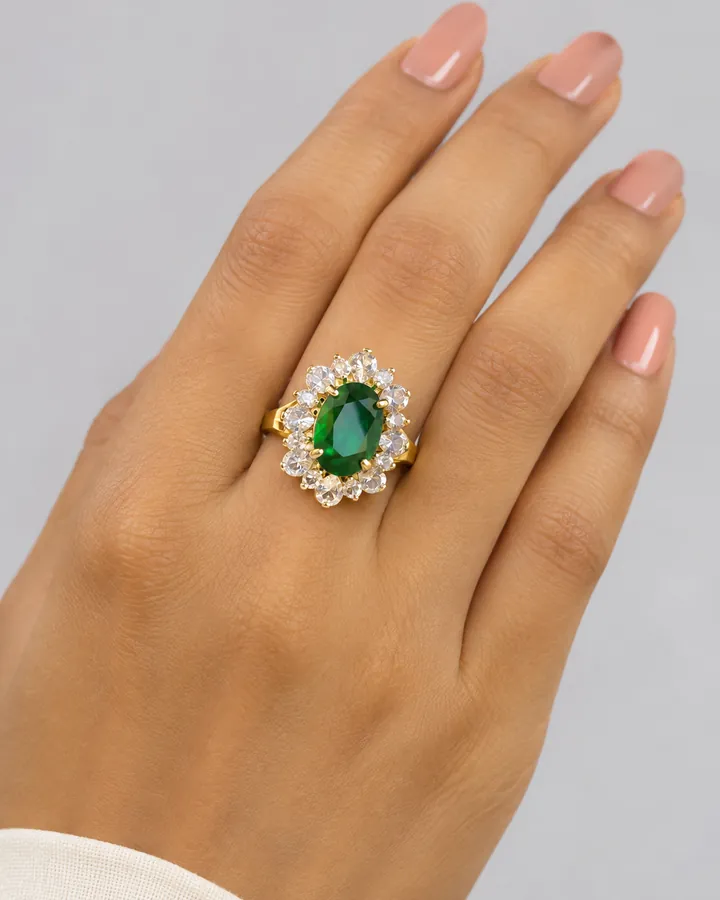
For ring photos on a hand model, raise the hand near the collarbone or face, keep the fingers relaxed and gently curled so the ring's face points at the camera, light it with a large soft source, and focus on the stone. The ring must be the sharpest thing in the frame and the hand must stay in it, because the finger is the only ruler a buyer has. With AI, CatalogX's Ring piece type sets up exactly that pose from one product photo of the ring.
What ring buyers zoom in on
Ring buyers do something no other jewellery buyer does as often: they zoom all the way in. They are checking three things.
- Stone size against the finger. A 6 mm centre stone and a 10 mm one look identical in a packshot. On a finger, they are obviously different.
- Band width and setting height. How much finger the band covers, and how high the stone sits. A tall setting catches on things; a thin band looks fragile.
- Stone quality and the setting. Prongs, bezel, pavé, and whether the stone has any life in it.
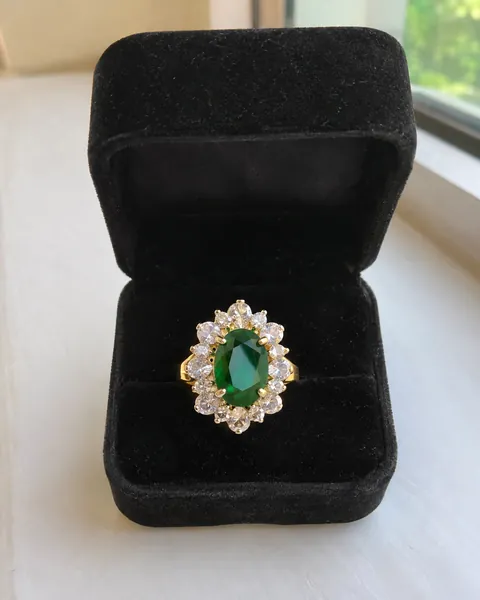
The on-hand photo answers the first two. The macro packshot answers the third. A good listing has both.
Posing the hand
- Raise the hand near the collarbone, the chin or the cheek. The face and neck give a soft background and a second scale reference, and the pose looks natural.
- Relax and curl the fingers slightly so the ring's face tilts toward the lens. A flat, splayed hand on a table looks like a passport photo of a hand.
- Ring on the ring finger for engagement and wedding rings; cocktail rings work on the index or middle finger too. Only one ring on the hand unless you sell a stack.
- Hands matter more than faces. Clean, moisturised skin, short neat nails and a neutral or nude polish. Bright nail colour pulls the eye away from the stone.
- Back of the hand to camera, angled slightly, is the classic. Add a side view for settings with height.
Light, focus and exposure
Light large and soft. A window with a sheer curtain, or a softbox close to the hand. Small, hard light gives a few harsh highlights and grey, lifeless stones; large soft light gives shape to metal and a clean sparkle to stones. A small white card on the opposite side lifts the shadows on the band.
Focus on the stone. At ring distances depth of field is a few millimetres, so tap to focus on the centre stone and accept that the fingertips soften. If your phone has a macro mode, use it for the packshot.
Watch the white balance. Warm indoor light turns white gold and silver yellow, and yellow gold orange. Daylight or a neutral bulb keeps metal colour honest, and that is what buyers will compare against when the ring arrives.
The shot list
| Shot | What it answers |
|---|---|
| Packshot on white, 3/4 angle from above | The design and the stone's face |
| Profile, on its side | Setting height and band shape |
| On hand, raised near the collarbone or face | Stone size against the finger, how it looks worn |
| Macro of the setting | Prongs, pavé, finish quality |
| Stated size: ring size and stone or face width in mm | Exact dimensions for careful buyers, in the listing text |
On Amazon, the main image for most jewellery is the ring alone on pure white, so the on-hand photo goes in a secondary slot. Etsy and Shopify let you lead with it. Check each marketplace's current category guide before listing.
Getting the on-hand photo with AI
- Photograph the ring on a plain, non-reflective surface, in soft daylight, filling the frame. Tap to focus on the stone. Use full resolution: under 1,600 pixels on the long side, CatalogX warns that stones, enamel and engraving that small will be approximated.
- Choose Accessories, then Jewellery, then Ring. The ring rule raises the hand into the frame near the collarbone or face, fingers relaxed and gently curled so the ring's face presents toward the camera and catches the light, and keeps the ring the sharpest element in the frame. The hand is treated as a stand, not the subject.
- Add the size if you have it: pick a tier (Mini for a thin band, Statement for a cocktail ring) or type the face width. For rings the measurement is passed to the render as written.
- Pick the model. The jewellery frame is a close portrait, so the face is part of the shot; choose a model who suits your buyer. Outfit defaults to the model's own.
- Zoom in on the result. Count stones, check the setting and the band width against your ring. After every jewellery render the metal colour is matched back to your photo, including white metal drifting toward champagne; on Pro and above an AI reviewer compares the render with your original.
The same raised-hand pose is used for bracelets and bangles; see bangles and bracelets on a model.
What it costs
One HD photo is 1 credit: $0.17–0.33 on monthly plans (Starter $9.99 for 30, Pro $19.99 for 100, Business $49.99 for 260, Agency $149.99 for 900), from $0.15 on volume plans, and the first 5 are free with no card. Sellers in India pay in rupees, from ₹12 a photo; see the jewellery model photoshoot page for India.
2K uses 2 credits and 4K (Business and above) uses 4, which is worth it for a ring buyers will zoom into.
Frequently asked questions
Raise the hand near the collarbone or face, relax and slightly curl the fingers so the ring's face tilts to the camera, light with a large soft source such as a window, and focus on the stone. Keep the hand in frame for scale.
Large, soft light: daylight through a sheer curtain or a softbox close to the hand, with a white card opposite to lift the shadows. It gives clean sparkle to stones without blowing out the metal.
Yes. In CatalogX choose Jewellery, then Ring, and upload a sharp photo of the ring. The hand is raised near the collarbone or face with the ring facing the camera as the sharpest thing in frame. Zoom in to check stones and setting before listing.
Any image model can drift on small pieces, which is why the hand stays in frame as a ruler and you can state the size. Compare the stone against the finger in the render with the real ring.
Your phone's full resolution, at least 1,600 pixels on the long side. Smaller than that and CatalogX warns that fine stones and engraving will be approximated.