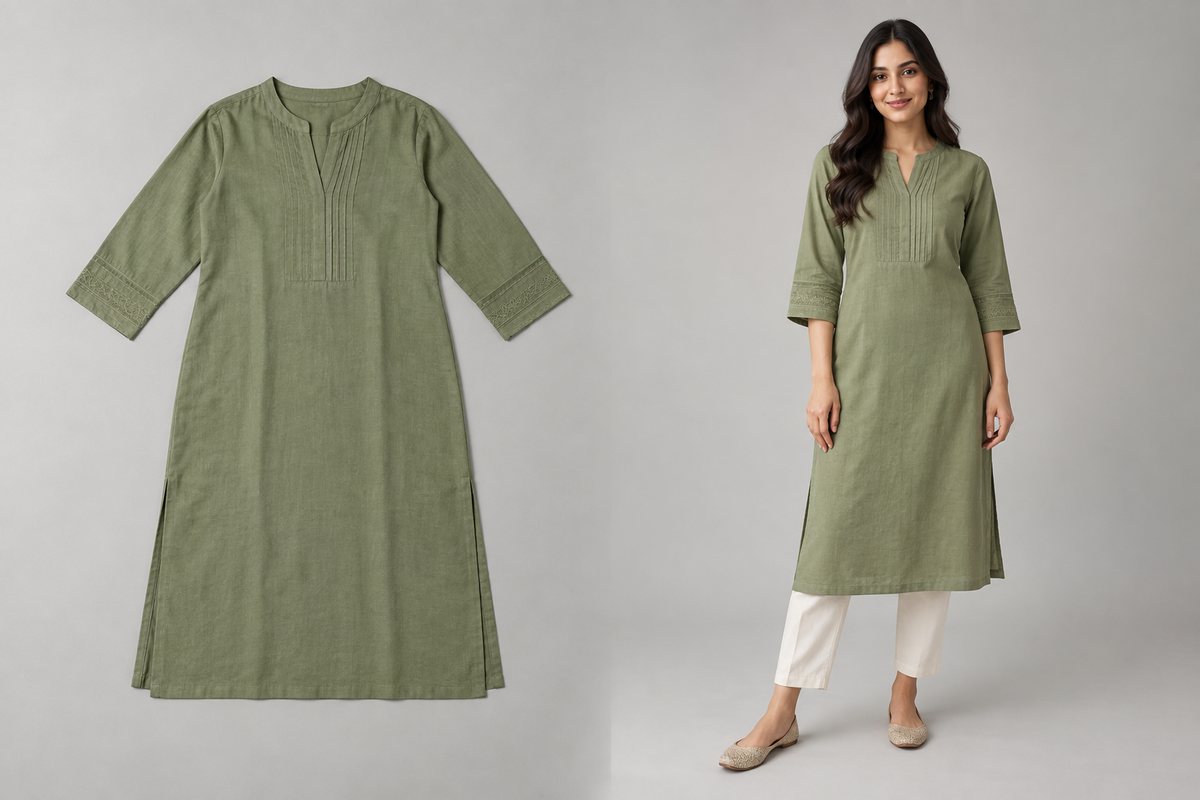
Flat-lay-to-model AI takes a photograph of a garment laid flat and generates a photorealistic image of a model wearing it. The AI reads the garment's cut, colour, pattern and length from the flat photo, then renders a person into the frame wearing it, with drape and shadow inferred. Output quality is decided almost entirely by the input: a flat lay shot square-on, in even light, on a plain background, with the garment fully uncreased, produces a usable render roughly nine times out of ten. A rumpled garment shot at an angle under a yellow bulb does not.
What flat-lay-to-model AI actually does
The process is not one step, and knowing the stages tells you where things go wrong.
- Garment analysis. The system reads the flat photo and identifies what the garment is — a kurti, a shirt dress, a co-ord set — along with its sleeve length, neckline, hem length, colour and pattern. Category matters because a kurti and a maxi dress that look similar flat hang completely differently.
- Measurement. Better pipelines measure proportions off the flat photo rather than guessing. CatalogX measures hem length explicitly and anchors it in inches, because left to its own devices the model renders almost every kurti too long.
- Colour correction. Indoor light is rarely neutral. CatalogX white-balances the photo before analysis, so one stated colour corrects every colour in the frame.
- Rendering. A model, pose and background are chosen, and the garment is composited onto the body with drape, fold and shadow generated to match.
- Review. The output is checked — measured checks plus a second AI pass with your original photo in hand — and re-shot automatically if it fails.
How to shoot a flat lay that converts well
This is the whole game. The single highest-leverage thing you can do is spend four extra minutes on the flat lay.
| Do | Why it matters |
|---|---|
| Shoot directly overhead, camera parallel to the floor | An angled shot skews the garment's proportions, and the AI renders the skew |
| Use indirect daylight — near a window, not in direct sun | Hard shadows get read as part of the pattern |
| Plain white or light grey surface | A patterned bedsheet bleeds into the garment's texture |
| Steam or press the garment first | Creases are reproduced faithfully, including onto the model |
| Lay sleeves and hems flat and symmetrical | A folded-under sleeve is read as a shorter sleeve |
| Fill the frame, but leave a margin | A cropped hem means the AI invents the missing length |
None of this needs a camera. A phone on a chair, a white sheet on the floor, and a window is a working setup.
The five mistakes that ruin the render
- Shooting on a hanger and calling it a flat lay. A hanger shot has the shoulders pulled up and the body hanging vertically. Its proportions are different from a true flat lay, and the hanger hook usually survives into the render.
- Yellow indoor light. A tungsten bulb turns white fabric cream and sage green grey-brown. If your tool does not white-balance before analysing, a colour fault here propagates into every single render of that garment.
- Folding a multi-piece set into one photo. A kurti-pant-dupatta set laid out overlapping reads as one garment. Photograph the pieces separately or spread so each is fully visible.
- Expecting a back view from a front photo. A front flat lay says nothing about how the back is cut. Any tool that produces a "back view" from a front-only photo is inventing it. CatalogX refuses to render a back view unless you upload a back photo.
- Cropping the hem. If the bottom of the garment leaves the frame, the AI has to guess the length — and it guesses long.
Flat lay or on-model — which should you list?
Both, in a specific order. The data across fashion marketplaces is consistent: on-model shots carry the main image, flat lays carry the detail slots.
- Main image: on-model. Buyers need to see scale and fit. Amazon's apparel guidelines push toward a standing model for this slot in most clothing categories.
- Slot two or three: flat lay. This is where a flat lay earns its keep — true colour, full pattern, nothing obscured by a body.
- Remaining slots: back view, detail crop, scale reference.
The flat lay is not a cheap substitute for a model shot. It is a different, complementary image, and listings that carry both outperform listings that carry either alone. We go deeper on this in flat-lay vs model shots.
Frequently asked questions
Yes. Flat-lay-to-model tools read the garment's cut, colour and proportions from a laid-flat photo and render a model wearing it. Output quality depends heavily on the input — an overhead, evenly lit, uncreased flat lay on a plain background produces a reliable render; an angled or creased one does not.
Camera directly overhead and parallel to the floor, indirect daylight from a window, plain white or light grey surface, garment steamed and laid symmetrical with sleeves and hem flat, and the whole garment inside the frame with a small margin. A phone is sufficient.
Because most models default to a longer hem than the garment actually has when the length is only inferred visually. The fix is measurement rather than inference — CatalogX measures the hem off your photo and anchors it in inches before rendering.
Not honestly. A front photo contains no information about how the back is cut, so any back view generated from it is invented. CatalogX requires an uploaded back photo before it will render a back view, and greys out back poses until you supply one.
Not as well. A hanger pulls the shoulders up and lets the body hang, which distorts the proportions the AI reads, and the hook frequently survives into the render. If a hanger shot is all you have it will usually work, but a true flat lay is more reliable.
Seconds rather than minutes on current tools — CatalogX renders in roughly 30 seconds including its quality review pass. The time cost has moved almost entirely to shooting the input well.