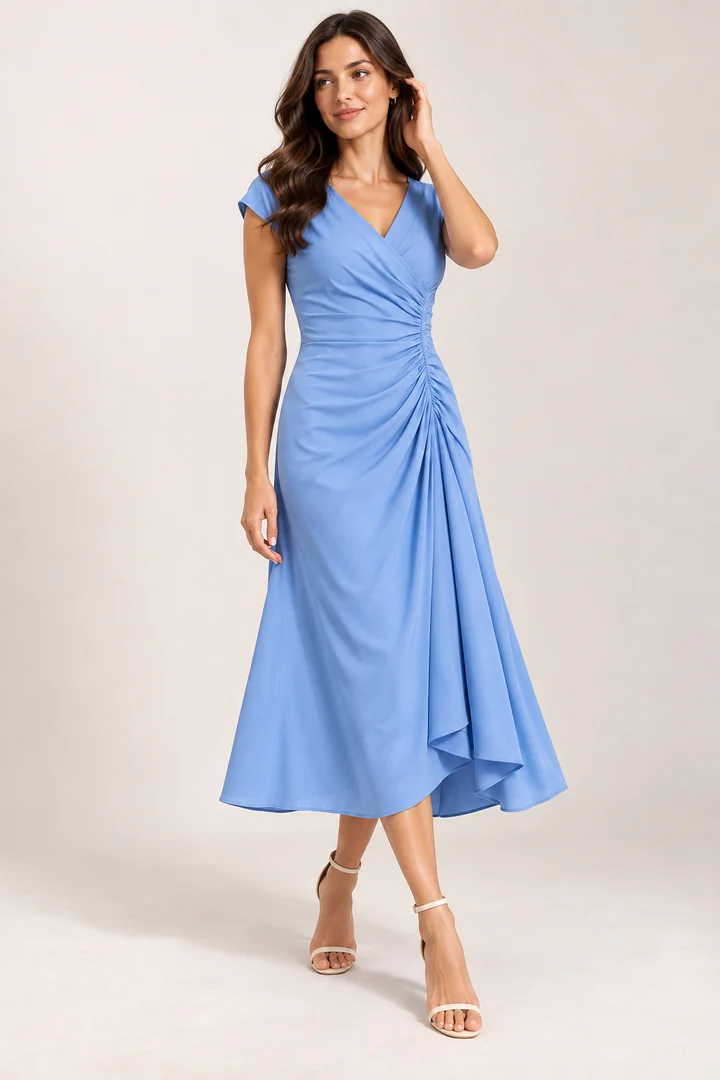
The same garment photographed with different poses, angles, and backgrounds will get very different reactions from shoppers. These choices aren't just aesthetic — they directly impact click-through rates, perceived quality, and purchase decisions.
Here's a practical guide to making the right choices for each product category.
Poses: What Works and Why
The model's pose communicates more than you think. It affects how the garment's fit, silhouette, and movement are perceived.
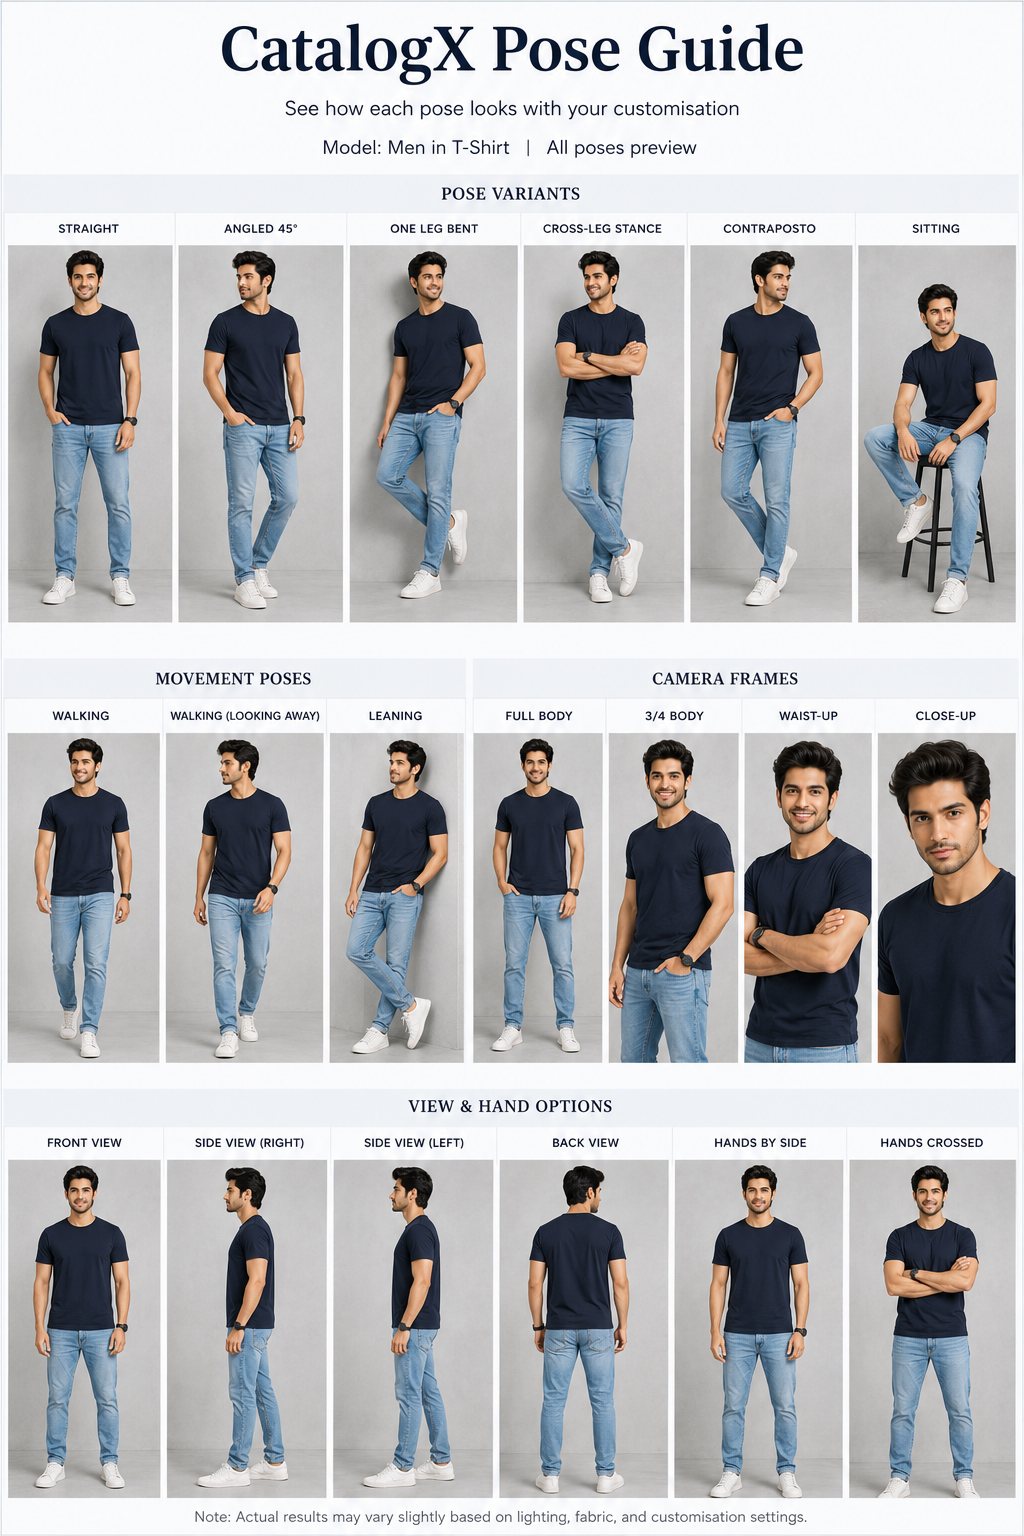
If you want to see each named option before choosing — straight, angled 45°, contrapposto, 3/4 body, waist-up and the rest — the model pose reference guide shows all of them on the same model and outfit, side by side.
- Standing straight (front-facing): The standard e-commerce pose. Clean, neutral, shows the garment's overall shape. Best for primary listing images. Works for every garment type.
- Walking mid-stride: Adds movement and energy. Shows how the garment moves — particularly good for dresses, skirts, sarees, and any flowing fabric. The walking pose also subtly shows the side silhouette.
- Hands on hips: Confident, fashion-forward feel. Works well for fitted garments where you want to emphasize the waist and structure — blazers, fitted kurtas, bodycon dresses.
- Relaxed/casual: One hand in pocket or arms relaxed. Creates a lifestyle feel. Good for casual wear — t-shirts, jeans, hoodies. Less appropriate for formal or ethnic wear.
Camera Angles: Showing What Matters
The camera angle determines what details are visible and how the garment's proportions are perceived.
- Front full-body: Shows the entire garment from hemline to neckline. Required for primary e-commerce images. Eye-level angle (not too high, not too low) gives the most natural proportions.
- 45-degree angle: Shows both front and side of the garment simultaneously. Reveals the silhouette and sleeve structure. Often the most flattering angle for fitted garments.
- Side profile: Essential for garments with interesting side details — side slits, draping, asymmetric hems. Also shows the garment's depth and how it sits away from the body.
- Back view: Critical for garments with back design elements — back necklines, prints, zippers, or detailing. Surprisingly overlooked in many listings.
- Waist-up / close-up: Focuses on upper body details — neckline, collar, embroidery, print pattern. Important for tops and ethnic wear with intricate neck or chest work.
Matching Angles to Garment Types
Different garment categories benefit from different angle priorities:
- Sarees: Full-body front (shows pallu draping), full-body side (shows pleats), and close-up (shows border and zari detail).
- Kurtas/Kurtis: Full-body front, 45-degree (shows sleeve and side), and waist-up (shows neckline embroidery).
- T-shirts/Shirts: Full-body front, 45-degree, and close-up of print/pattern detail.
- Dresses: Full-body front, walking pose (shows movement), and back view if back design exists.
- Blazers/Jackets: Full-body front, 45-degree (shows lapel and structure), and close-up of buttons/pocket details.
- Jeans/Pants: Full-body front, side profile (shows leg shape), and close-up of waistband/pocket details.
Upload your garment and get a studio-quality AI mockup in 30 seconds. 5 free credits, no card needed.
Try Free Now →
Backgrounds: Setting the Right Context
Background choice affects perceived brand positioning and can make or break a listing's visual impact.
- Studio white/light gray: The universal default. Required as the primary image on most marketplaces. Clean, professional, puts all attention on the garment. If you can only choose one background, this is it.
- Minimal gradient: A subtle gradient (light to slightly darker) adds depth without distraction. Works well for brand websites where pure white feels too clinical.
- Outdoor/urban: Street scenes, parks, architectural settings. Creates a lifestyle context. Best for casual and streetwear brands targeting younger demographics.
- Indoor/festive: Traditional interiors, festive decorations, warm lighting. The natural choice for ethnic wear — sarees, lehengas, sherwanis — especially for wedding and occasion categories.
- Solid colors: A colored background (beige, sage, dusty rose) that complements the garment can make the product pop. Effective for social media ads where you need to stand out in a feed.
Common Mistakes to Avoid
- Busy backgrounds for marketplace listings: Amazon, Etsy, Shopify, Flipkart and Myntra all prefer white/neutral backgrounds for primary images. Save the lifestyle shots for secondary image slots.
- Mismatched pose energy: A dynamic walking pose for formal suits looks off. A stiff standing pose for beachwear looks off. Match the pose energy to the garment's occasion.
- Too many close-ups, not enough full-body: Buyers want to see the complete garment first. Lead with full-body, then provide angles and close-ups as supporting images.
- Inconsistent lighting across your catalog: If some products use warm golden lighting and others use cool studio lighting, your catalog page looks disjointed. Pick one lighting style and stick with it.
A Practical Decision Framework
For each product, choose your image set using this framework:
- Image 1: Full-body, front, standing, white background (mandatory for marketplaces)
- Image 2: Full-body, 45-degree or walking, white background (shows silhouette and movement)
- Image 3: Waist-up or close-up for detail (neckline, pattern, texture)
- Image 4: Full-body, lifestyle background (for context and aspiration)
- Image 5: Back view or flat-lay detail (for back design or fabric quality)
With AI mockup tools, generating all five takes a few minutes. Without AI, this set would require multiple pose changes, background swaps, and editing sessions — a half-day photoshoot distilled into minutes of configuration.
Related Articles
- Model Pose Reference Guide: See Every Pose, Frame and View Option
- Flat-Lay vs Model Shots: Which Sells More?
- How to Photograph Sarees and Kurtas Without a Model
- Why Product Photography Is So Expensive for Fashion Brands
Frequently Asked Questions
For marketplace listings, a natural front-facing standing pose works best as the primary image. It clearly shows the garment's fit, silhouette, and design. For secondary images, use a slight three-quarter angle to show depth and draping. Dynamic poses work better for social media and lifestyle content than for product listings.
Use a pure white background (RGB 255,255,255) for marketplace primary images on Amazon, Etsy, Shopify, Flipkart and Myntra. For secondary images and social media, lifestyle backgrounds, solid colors, or studio gradients add visual interest. Always check each platform's specific background requirements before uploading.
Eye-level is the standard for fashion product photography because it shows the garment as a customer would see it. Slightly lower angles add a sense of authority and work well for formalwear. Higher angles can make the model look smaller and are generally avoided for full-length fashion shots.
Most marketplaces require a minimum of 3-4 images per listing. The ideal set includes a front-facing primary shot, back view, side or three-quarter angle, detail close-up of fabric or design elements, and optionally a lifestyle context image. Using all available image slots improves conversion and reduces returns.
For sarees, use a standing pose with one hand on the hip to show the full drape including the pallu. The model should face slightly at an angle to display the fabric fall. For kurtas and salwar suits, a natural front-facing pose with arms relaxed shows the full garment shape and embroidery details clearly.